Building an Ubuntu custom image from scratch for Google Compute Engine
This is a memorandum that I got running an Ubuntu image to work on Google Compute Engine (as of May 2014 which isn't officially supported). The original motivation was that I wanted to run dokku that requires Ubuntu 14.04 x64 or 12.04 x64.
Note: These steps very much refer the instructions on the similar ones for FreeBSD. For simplicity, I'm logging the steps that are covered by that post as well.
Create a raw disk image and install Ubuntu
1. Download and build the stable version of qemu in your local workstation.
Extract the downloaded package.
$ bzip2 -d <downloaded-file>
$ cd qemu-2.0.0
$ ./configure
$ make
$ make install
Note: Haven't tried it yet, it should be working fine if installed via a packaging manager such as apt-get install qemu.
2. Download the ISO for the Ubuntu.
Assuming the downloaded file name is ubuntu-14.04-desktop-amd64.iso
3. Create a qemu disk image as a raw disk.
$ qemu-img create disk.raw 10g
4. Launch a qemu VM and boot from the Ubuntu ISO
$ qemu-system-x86_64 --enable-kvm -smp 1 -m 3750m -net nic,model=virtio -net user,hostfwd=tcp::2222-:22 -device virtio-scsi-pci,id=scsi -device scsi-hd,drive=hd,physical_block_size=4096 -drive if=none,id=hd,file=disk.raw,cache=none -cdrom ubuntu-14.04-desktop-amd64.iso
Note: To ssh to the guest os later, forwarding the 2222 port to the 22 port of the guest os by specifying -net user,hostfwd=tcp::2222-:22
If succeeded you should get a VNC server running like this: VNC server running on 127.0.0.1:5901
5. Connect to the VNC server. The below illustrates the vncviewer as a client
$ vncviewer -noshared -depth 16 -compresslevel 0 -quality 9 :<the last 2 digit of the port of the running VNC server>
E.g.
$ vncviewer -noshared -depth 16 -compresslevel 0 -quality 9 :1
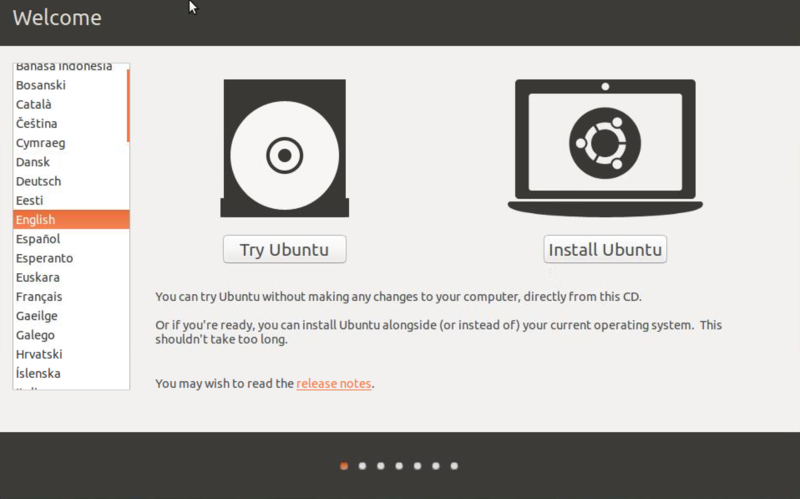
6. Install Ubuntu from the ISO image (through vncviewer).

Selecting the default values should work here.
After installing the OS image, install the sshd package sudo apt-get install ssh
Change configurations to boot the image on Compute Engine.
7. Change required configurations.
Add following kernel options to /etc/default/grub
# to enable paravirtualization functionality.
CONFIG_KVM_GUEST=y

# to enable the paravirtualized clock.
CONFIG_KVM_CLOCK=y

# to enable paravirtualized PCI devices.
CONFIG_VIRTIO_PCI=y

# to enable access to paravirtualized disks.
CONFIG_SCSI_VIRTIO=y

# to enable access to the networking.
CONFIG_VIRTIO_NET=y
Install python and sshd (it you haven't)
$ sudo apt-get install python
$ sudo apt-get install ssh
Note: You can ssh to the guest os by something like ssh -p 2222 127.0.0.1 (as you specified the hostfwd-tcp::2222-:22 option)
Note: As in this official Compute Engine document, there are some recommended configurations as well. I'm not taking these instructions here, but it's highly recommended to go through the document
8. Shut down the qemu VM instance
After editing configurations, shutdown the qemu instance.
Package the image and upload it as a Compute Engine image. (From your local workstation again)
9. Package the image
Package the image as follows:
$ tar -Szcf ubuntu_14.04_image.tar.gz disk.raw
10. Upload the package to Google Cloud Storage
If Google Cloud SDK is not installed, install the SDK as in this document
Create a bucket in the Google Cloud Storage
$ gsutil mb gs://<bucket-name>
Upload the image to the bucket
$ gsutil cp ubuntu_14.04_image.tar.gz gs://<bucket-name>
11. Add the uploaded image as a Google Compute Engine image
$ gcutil addimage ubuntu-14 gs://<bucket-name>/ubuntu_14.04_image.tar.gz
12. Create an instance from the uploaded image.
$ gcutil addinstance ubuntu-14 --image=ubuntu-14 --zone=asia-east1-a --machine_type=n1-standard-1
13. SSH to the instance
$ gcutil ssh --ssh_user=<Created-user-in-the-qemu-guest-image> ubuntu-14
If everything goes fine, you should be able to login to the instance.
$ gcutil ssh --ssh_user=thagikura ubuntu-14
INFO: Zone for ubuntu-14 detected as asia-east1-a.
INFO: Running command line: ssh -o UserKnownHostsFile=/dev/null -o CheckHostIP=no -o StrictHostKeyChecking=no
Welcome to Ubuntu 14.04 LTS (GNU/Linux 3.13.0-24-generic x86_64)

 * Documentation:  https://help.ubuntu.com/

Last login: Sat May 10 13:31:42 2014 from xx.xxx.xx.xxx
thagikura@ubuntu-14:~$
thagikura@ubuntu-14:~$ uname -a
Linux ubuntu-14.c.gcp-samples.internal 3.13.0-24-generic #46-Ubuntu SMP Thu Apr 10 19:11:08 UTC 2014 x86_64 x86_64 x86_64 GNU/Linux